


TECHNICAL GUIDE · TILE LAYOUT
Layout first Then cut
You reach the last wall and there is a narrow strip left to fill. Before choosing a cutter for that awkward piece, check whether the layout can move. Two wider end pieces may be an option.
Jump to topic
Work out the widths, including grout joints. Then mark the cut lengths and choose the tool.
01 Check both ends of the row
Sketch the edges of the tiled area, doorways, recesses and adjoining surfaces. Note which edges will remain visible. A shift that improves one end can create an awkward cut at the other.
Try a layout with cut pieces at both ends. Compare their widths and the appearance of the whole area.
02 Include the joints in the calculation
You need three measurements:
- the width available for tiles and grout joints, after allowing for the specified perimeter gaps;
- the actual tile dimension along the row;
- the grout-joint width specified for the material and project.
Measure the tiles you will use: their actual dimensions can vary slightly. The size printed on the box is not enough for an accurate setting-out drawing. Include the grout-joint widths in both directions.
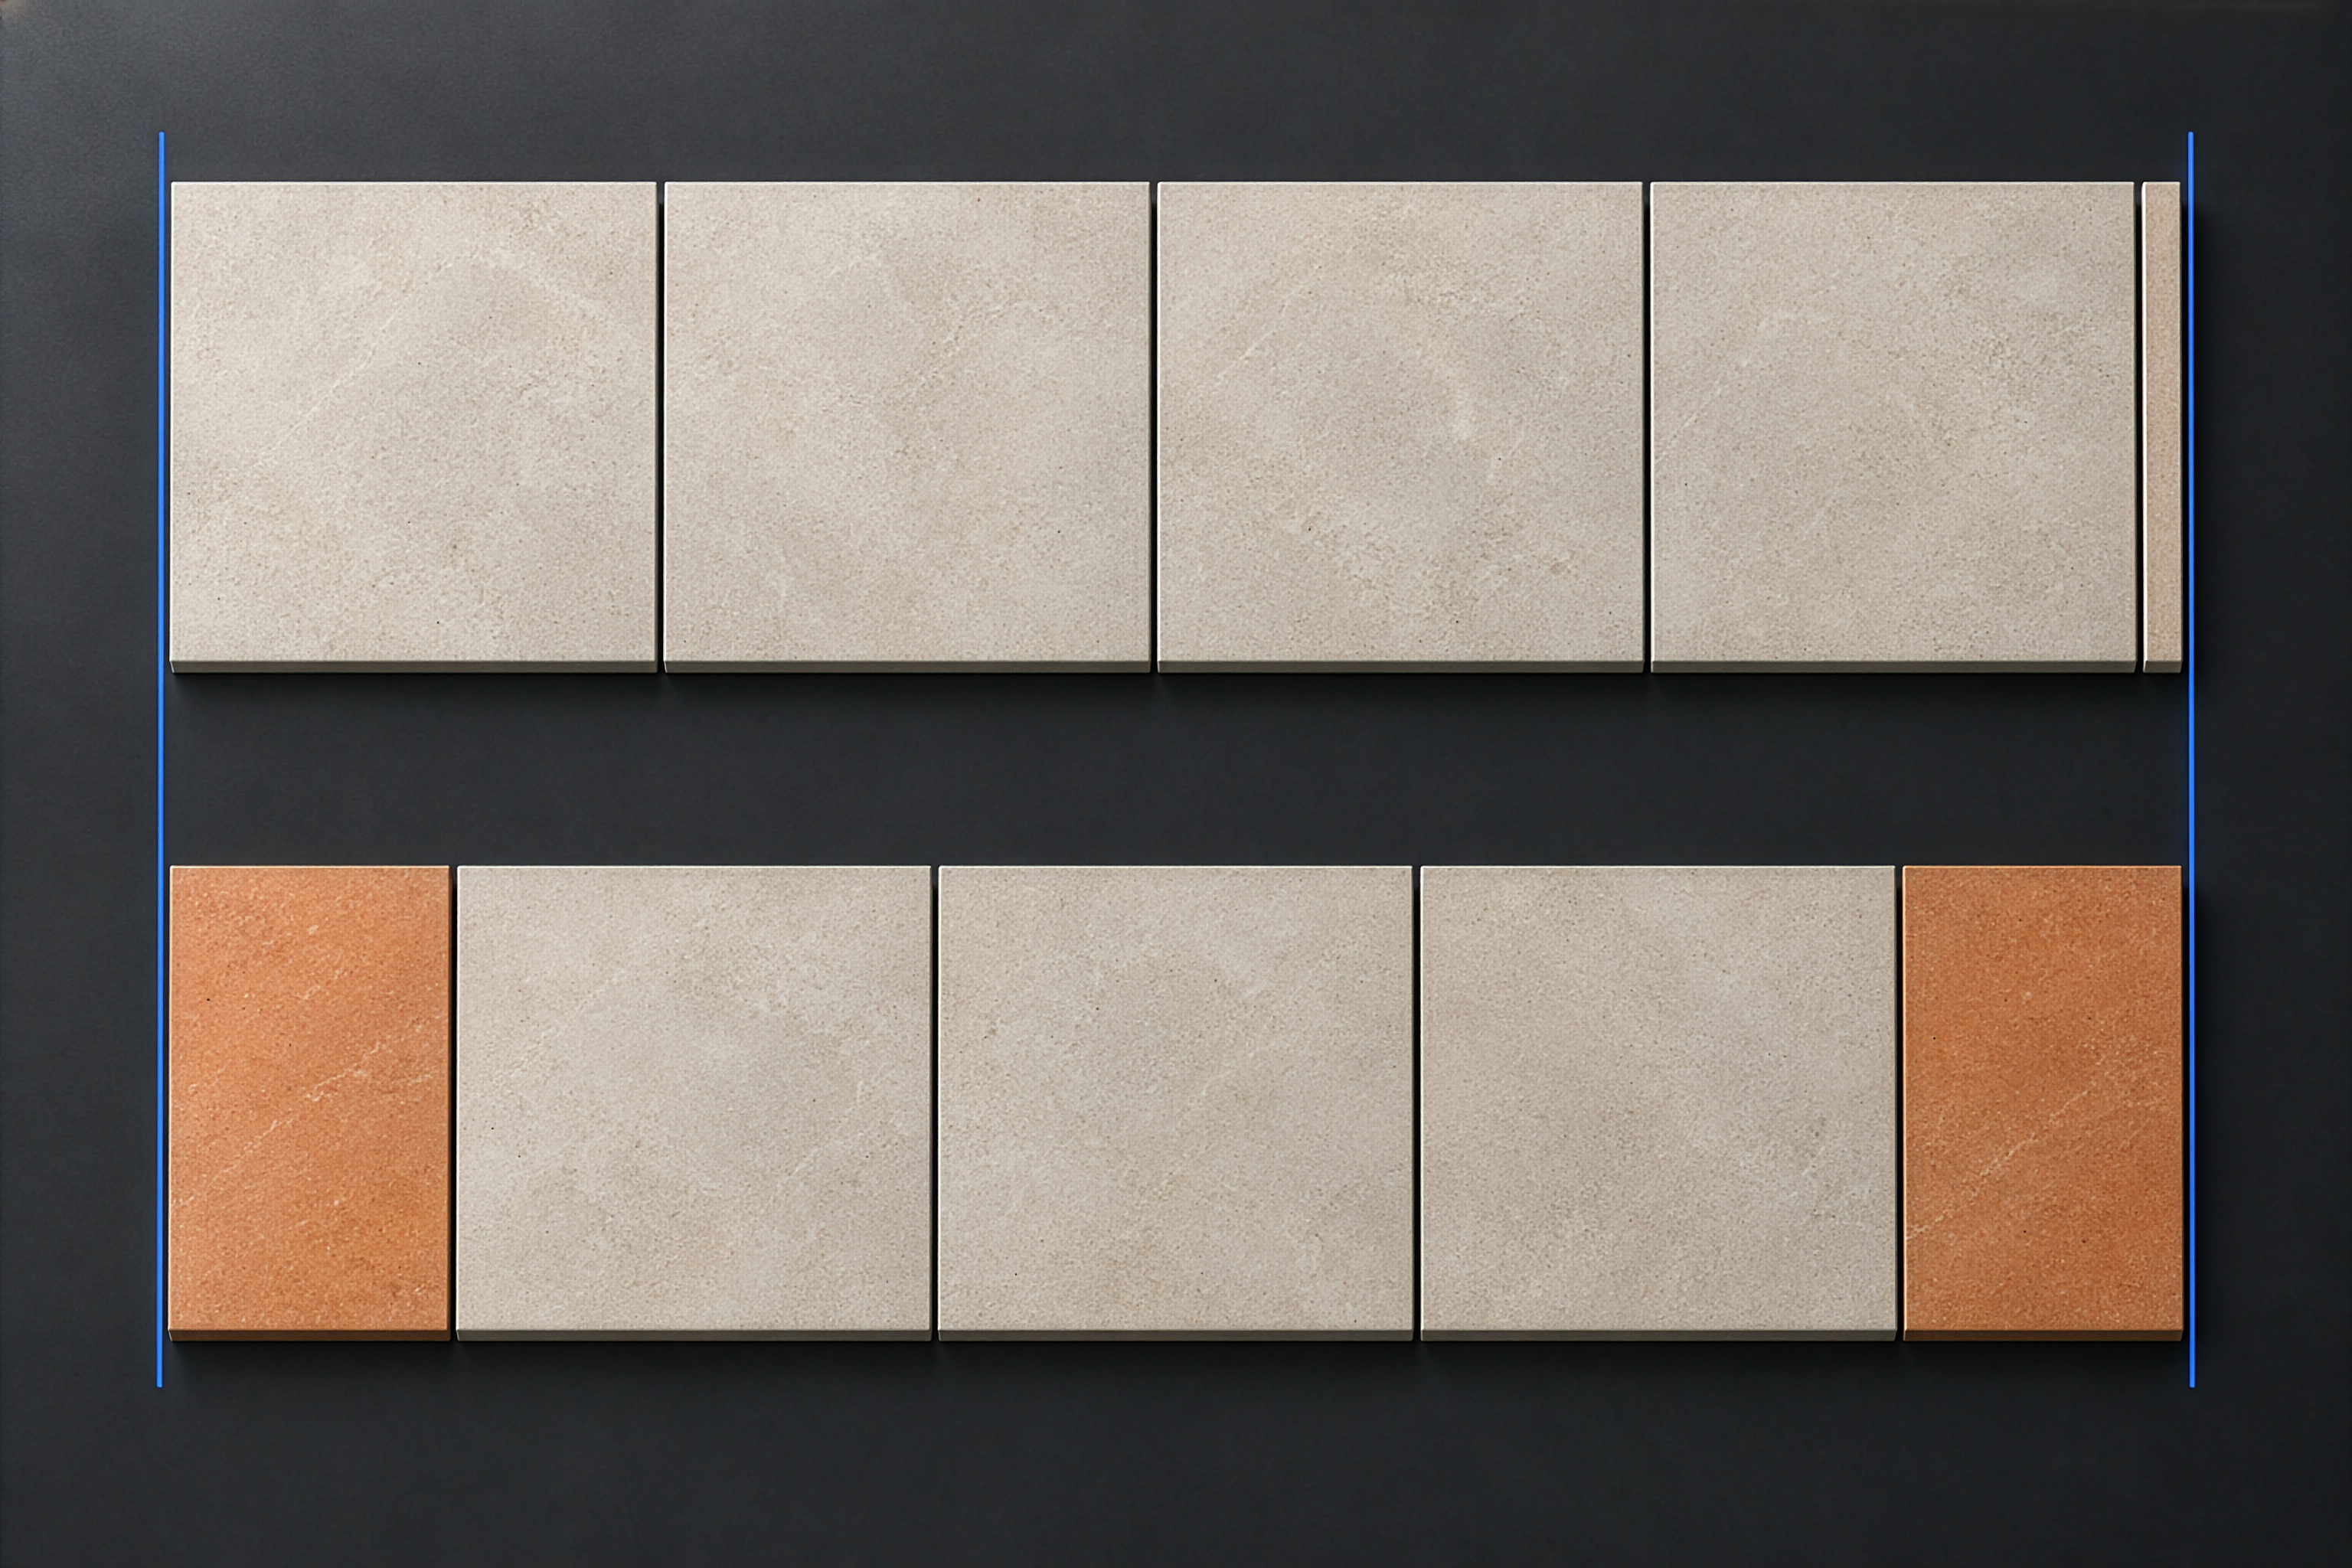
03 Worked example: one 38 mm strip or two 319 mm end pieces
Take a straight, unstaggered row. The available width is 2,450 mm, each tile measures exactly 600 mm along that row, and the grout joints are 3 mm. The perimeter gaps have already been deducted. These are calculation inputs, not joint-width recommendations for every installation.
| Layout | Tiles and cut pieces | Grout joints | Total width |
|---|---|---|---|
| Start with a full tile at one end | 4 × 600 mm + 38 mm | 4 × 3 mm | 2,450 mm |
| Cut pieces at both ends | 319 mm + 3 × 600 mm + 319 mm | 4 × 3 mm | 2,450 mm |
Starting with four full tiles leaves:
2,450 − 4 × 600 − 4 × 3 = 38 mm
For the second layout, subtract three full tiles and four joints, then divide the remaining width between the ends:
(2,450 − 3 × 600 − 4 × 3) ÷ 2 = 319 mm
Simply halving the 38 mm remainder will not give that result. The second layout has three full tiles between its end pieces, rather than four.
04 Check the drawing against the actual space
Dry-lay the alternatives with the intended grout spacing. Check the available width at several points. If the walls are not parallel, the perimeter pieces may need different measurements.
For a staggered pattern, check the complete repeat of rows. A generous cut in the first row says nothing about the next one. Include pattern direction and the agreed alignment with adjoining tilework.
Settle the final layout after this check. Then turn it into a cut list.
05 Record strip width and cutting length separately
“A 100 mm strip” does not give you enough information to choose a cutter. It describes the piece you want to keep. The cutting line could be 600 mm or 1,200 mm long.
For a rectangular 600 × 1,200 mm tile:
| Finished piece | Cutting direction | Straight cutting length |
|---|---|---|
| 100 × 600 mm | Parallel to the 600 mm edge | 600 mm |
| 100 × 1,200 mm | Parallel to the 1,200 mm edge | 1,200 mm |
Give every cut piece a reference that matches the drawing. Record its finished size, cutting length and any edge that will remain exposed. Measure pieces along an uneven wall individually. Being in the same row does not make them identical.
06 Match the cutter to the finished cut list
For straight manual cutting, consider the Puppy manual tile cutter range. Its folding measuring guide helps position the tile, while the green laser indicates the scoring line. Compare working length with the full cut you need to make.
If you choose wet cutting, look at BigDog's manual and automatic feed modes. In automatic mode the head travels and returns while the operator supervises the cut. You still measure and position each tile.
Match the scoring wheel or blade to the material and tool. Before cutting the batch, check the result on the same material with the intended cut length, piece width and support. If the break runs away from the score, see “Scored straight. Broke off line.”.
Use your drawing and cut list with our guide to choosing a tile cutter. Check the material type, thickness, longest cutting line and smallest planned cut piece.